In this example tutorial, you will learn how to implement facebook login in react apps using react-facebook-plugin.
First of all, create facebook app for react facebook login, here are steps to create a facebook login application:
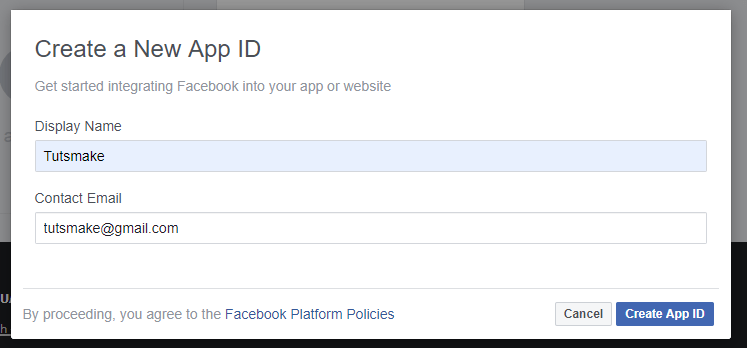
Step 1 – Visit the following url https://developers.facebook.com/apps/ and create a new facebook app.
Step 2 – Create facebook app with email and app name look like below picture:

Step 3 – Then, Navigate to setting->advanced and add redirect URL, looks like below picture:

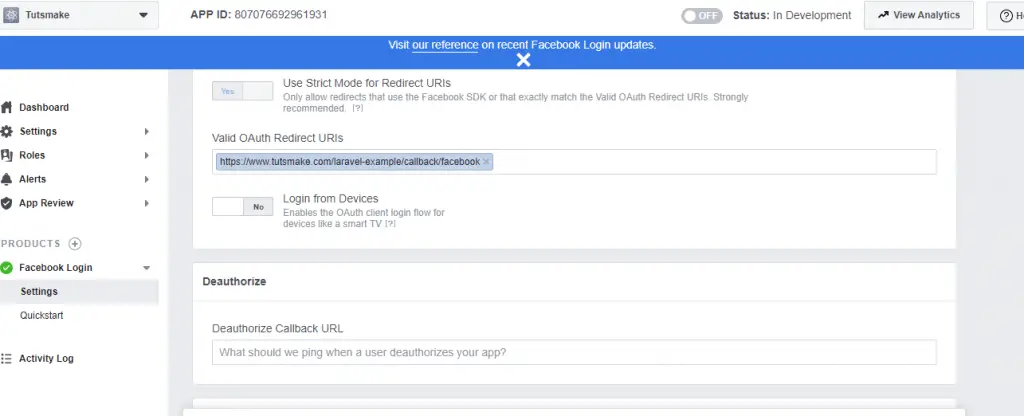
Step 4 – Now, add valid auth redirect url. So, click facebook login->setting and add valid auth redirect URL, looks like below picture:

Step 5 – Finally, Navigate to facebook developers dashboard and copy the following App ID and App SECRET, looks like below picture:

Now, save Facebook secret id and secret key, Which is found from the Facebook Developer Console App.
How to integrate Facebook Login API into your React app
Steps to integrate facebook login:
Step 1 – Create React App
Run the following command on your cmd to create a new react app:
npx create-react-app react-axios-tutorial
To run the React app:
npm start
Check out your React app on this URL: localhost:3000
Step 2 – Install Bootstrap 4 Library
In this step, execute the following command to install boostrap 4 library into your react app:
npm install bootstrap --save
Add bootstrap.min.css file in src/App.js file:
import React from 'react';
import '../node_modules/bootstrap/dist/css/bootstrap.min.css';
function App() {
  return (
    <div>
      <h2>React Facebook Login Example</h2>
    </div>
  );
}
export default App;
Step 3 – Install and Configure react-facebook-login
In this step, run the following command to install Facebook login plugin into your react app:
npm install react-facebook-login
Step 4 – Create Facebook Login Component
In this step, /src/ directory and create a component, which names FacebookLoginComponent.js:
import React from 'react'
import React, { useState } from 'react';
import FacebookLogin from 'react-facebook-login';
import { Card, Image } from 'react-bootstrap';
import './App.css';
class FacebookLoginComponent extends React.Component{
    const [login, setLogin] = useState(false);
    const [data, setData] = useState({});
    const [picture, setPicture] = useState('');
    const responseFacebook = (response) => {
    console.log(response);
    setData(response);
    setPicture(response.picture.data.url);
    if (response.accessToken) {
          setLogin(true);
        } else {
          setLogin(false);
        }
    }
    render(){
        return (
        <div class="container">
          <Card style={{ width: '600px' }}>
            <Card.Header>
              { !login &&
                <FacebookLogin
                  appId="562118384400275"
                  autoLoad={true}
                  fields="name,email,picture"
                  scope="public_profile,user_friends"
                  callback={responseFacebook}
                  icon="fa-facebook" />
              }
              { login &&
                <Image src={picture} roundedCircle />
              }
            </Card.Header>
            { login &&
              <Card.Body>
                <Card.Title>{data.name}</Card.Title>
                <Card.Text>
                  {data.email}
                </Card.Text>
              </Card.Body>
            }
          </Card>
        </div>
        );
    }
}
export default FacebookLoginComponent;
Step 5 – Import Facebook Login Component in App.js
In this step, you need to add the FacebookLoginComponent.js file in src/App.js file:
import React from 'react';
import '../node_modules/bootstrap/dist/css/bootstrap.min.css';
import './App.css';
import FacebookLoginComponent from './FacebookLoginComponent';
function App() {
  return (
    <div>

        <FacebookLoginComponent />
    </div>
  );
}
export default App;
Conclusion
Add Facebook login button in react apps; In this example tutorial, you have learned from scratch how to implement facebook login in react apps using react-facebook-plugin.