If you want to interact and manage MySQL databases through a web-based, user-friendly interface instead of manually entering commands in the cmd or command line. So, for this you can use phpMyAdmin on ubuntu; In this tutorial, we will show you how to install PHPMyAdmin on Ubuntu 22.04 and configure it with the system.
How to Install phpMyAdmin in Ubuntu 22.04
Here are some steps to install and configure phpMyAdmin on the Ubuntu 22.04 system using a terminal or command line:
Step 1 – Upgrade the system
First upgrade the system, so that all the latest dependency requirements of the Ubuntu package repository are upgraded, and there are no problems with the installation.
sudo apt update
sudo apt upgrade
Step 2 – Install PhpMyAdmin Ubuntu 22.04
In Ubuntu, the apt package manager gives the command sudo apt install phpmyadmin to install phpmyadmin, type this command on the terminal window and press enter and wait for a few seconds this command will install phpmyadmin in your system:
sudo apt install phpmyadmin
During the installation, you’ll be prompted to configure phpMyAdmin. Here’s how to configure it:
- Choose the web server you’re using. If you’re using Apache, select it by pressing the spacebar and then press Enter.
- Select “Yes” when asked if you want to configure the database for phpMyAdmin with dbconfig-common.
- Enter the MySQL root password you set earlier when prompted.
- Set a password for the phpMyAdmin application itself.
Step 3 – Configure PHPMyAdmin
Now complete configuration will be done, for this, you have to copy the phpmyadmin.conf from to Apache’s conf-available directory, for this, you can use this:
sudo cp /etc/phpmyadmin/apache.conf /etc/apache2/conf-available/phpmyadmin.conf
Now, you need to activate or enable phpmyadmin configuration, so use sudo a2enconf phpmyadmin.conf on the terminal:
sudo a2enconf phpmyadmin.conf
Step 4 – Restart Apache 2 Server
To restart the Apache web server to apply the changes, you can do so using sudo service apache2 restart:
sudo service apache2 restart
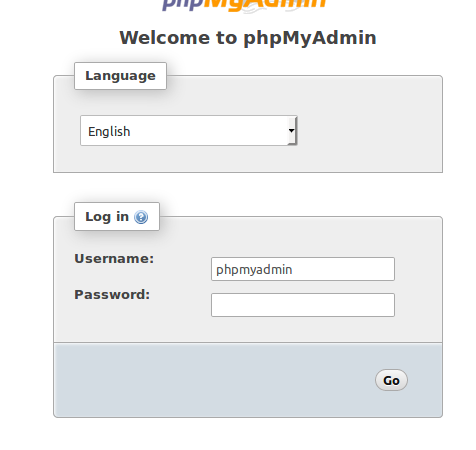
Step 5 – Access phpMyAdmin
Open your browser and type the below url with server ip:
http://[SERVER_PUBLIC_IP]/phpmyadmin
Then you will look like on your browser:

Step 6 – Secure phpMyAdmin Optional
To enhance the security of your phpMyAdmin installation, you can perform additional configurations such as changing the phpmyadmin access URL, setting up authentication, and configuring HTTPS. Be sure to follow best practices for securing your server.
Conclusion
Through this tutorial, we have learned how to install and configure phpmyadmin on ubuntu 22.04 server.