Laravel 8 convert pdf to image example. In this tutorial, you will learn how to convert pdf to image in laravel 8 app.
First of all, you will learn how to install imagick package. And also learn how to enable imagick package in apache web server.
How to Convert PDF to Image in Laravel?
Use the following steps to convert pdf to image in laravel 8 app:
Step 1: Install Laravel 8 App
First of all, open your terminal OR command prompt and execute the following command to install laravel 8 app:
composer create-project --prefer-dist laravel/laravel blog
Step 2: Installing Imagick PHP Extension And Configuration
Now, execute the following command on terminal to install Imagick PHP extension is available from the Ubuntu’s repositories:
sudo apt install php-imagick
Use the following command to check the list the version available from the Ubuntu repositories using the apt list command.
sudo apt list php-magick -a
The -a flag tells apt to list all version of a package available from the repositories. The output will look similar to the following, and at the time of this writing, there was only a single version available.
php-imagick/bionic,now 3.4.3~rc2-2ubuntu4 amd64 [installed]
restart apache web server
Then, restart Apache web server:
sudo systemctl restart apache2
Verify Installation
Execute the following command to verify the installation:
php -m | grep imagick
If the installation was successful, the output of the command will simply show one line, and it will only contain the name of the module imagick.
imagick
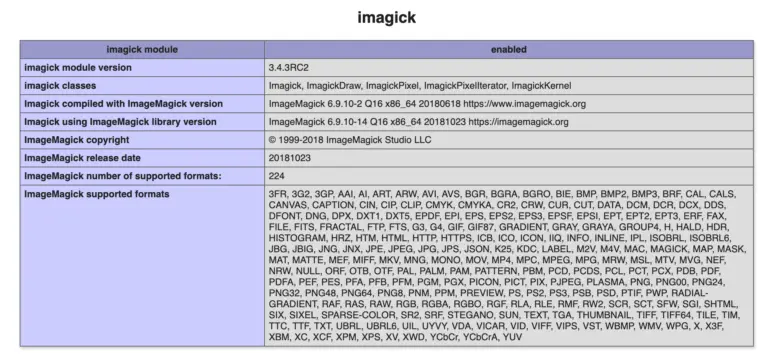
For a much more detailed verification of whether the PHP module was installed correctly, use the phpinfo() method.
On the command line, execute the following command
php -r 'phpinfo();' | grep imagick
Which will output the following information, where the modules status is shown as enabled.
/etc/php/7.3/cli/conf.d/20-imagick.ini,
imagick
imagick module => enabled
imagick module version => 3.4.4
imagick classes => Imagick, ImagickDraw, ImagickPixel, ImagickPixelIterator, ImagickKernel
imagick.locale_fix => 0 => 0
imagick.progress_monitor => 0 => 0
imagick.set_single_thread => 1 => 1
imagick.shutdown_sleep_count => 10 => 10
imagick.skip_version_check => 1 => 1
Alternatively, by adding the phpinfo() function to a php script, and then accessing the script from a web browser. Now, you are able to see the module is installed and enabled.

After some authorization change in fowling the path
/etc/ImageMagick-6/policy.xml
< policy domain="coder" rights="none" pattern="PDF" / >
To Convert
< policy domain="coder" rights="read|write" pattern="PDF" / >
Step 3: Add Route
In this step, add routes for pdf to image convert in laravel 8 app. So, navigate to “routes/web.php” file and add following route.
<?php

use Illuminate\Support\Facades\Route;
use App\Http\Controllers\MyController;

Route::get('pdf-to-image', [MyController::class, 'index'])->name('form');
Step 3: Create Controller
In this step, execute the following command to create controller as MyController:
php artisan make:controller MyController
And update the following code into it:
<?php

namespace App\Http\Controllers;

use Imagick;
use Illuminate\Http\Request;
use Illuminate\Support\Facades\Blade;

class MyController extends Controller
{
    /**
     * Write code on Method
     *
     * @return response()
     */
    public function index()
    {
        $imagick = new Imagick();

        $imagick->readImage(public_path('dummy.pdf'));

        $imagick->writeImages('converted.jpg', true);

        dd("done");
    }
}
Now, open your terminal and execute the following command on it for start development server:
php artisan serve
Now you can open bellow URL on your browser:
http://localhost:8000/pdf-to-image