Laravel 7, 6, 5 flash message. This tutorial explains, how you can implement flash messages in laravel applications.
When we work with laravel, we need to show/display flash success and error messages. Here you can learn the various method to show or display flash error or success message in laravel applications:
This tutorial also explains, how you can implement success or error messages with sweet alert js in your laravel application.
Laravel Flash Message
Here, you will learn the types of flash messages.
- Laravel Success Flash Message
- Laravel Error Flash Message
- Laravel Flash Success With Sweet alert
- Laravel Flash Error With Sweet alert
Laravel Success Flash Message
First of all, we need to add the below code in your HTML files:
@if(Session::has('success'))
    <div class="alert alert-success">
        {{Session::get('success')}}
    </div>
@endif
The second thing, When you send the success message. So you can use the below code in your controller:
return Redirect::to("/")->withSuccess('Success message');
Laravel Error Flash Message
If you want to display an error message in your blade views, so you can add the below code in your blade file:
@if(Session::has('fail'))
    <div class="alert alert-danger">
       {{Session::get('fail')}}
    </div>
@endif
The second thing, add the below code in your controller, where you want to send the error message:
return Redirect::to("/")->withFail('Error message');
If you want to use the sweet alert message in your laravel application. So, first of all, you need to include sweet alert CDN or sweet alert js library in your laravel application:
Laravel Flash Success With Sweet Alert
If you want to show a success message with sweet alert. So you can use the below code in your blade view files:
   @if(Session::has('success'))
     <script type="text/javascript">
        swal({
            title:'Success!',
            text:"{{Session::get('success')}}",
            timer:5000,
            type:'success'
        }).then((value) => {
          //location.reload();
        }).catch(swal.noop);
    </script>
    @endif
If you use the above code for a success message, this message automatically hides after 5 seconds.
The sweet alert-success message looks like:

Laravel Flash Error With Sweet Alert
If you want to show an error message with a sweet alert. So you can use the below code in your blade view files:
   @if(Session::has('fail'))
   <script type="text/javascript">
      swal({
          title:'Oops!',
          text:"{{Session::get('fail')}}",
          type:'error',
          timer:5000
      }).then((value) => {
        //location.reload();
      }).catch(swal.noop);
  </script>
  @endif
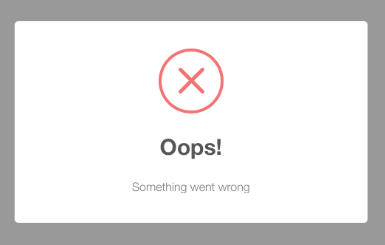
If you use the above code for an error message, this message automatically hides after 5 seconds.
The sweet alert error message looks like:

Conclusion
In this tutorial, you have learned, how you can implement flash messages in laravel applications.
You may like
- Laravel Google ReCaptcha Form Validation
- Form Validation Example In Laravel 6
- Laravel Ajax Form Submit With Validation Tutorial
- Laravel Tutorial From Scratch | Step By Step
- Laravel – Ajax CRUD (Operation) Application Example
- Laravel CRUD Example Tutorial (Step By Step)
- Laravel Angular JS CRUD Example Tutorial