Upload file to github command line. Today we will learn how to easily upload project or file on github using command line. First we will create a new repository on github and after we will fill the repository name and description.
Upload Project/Files On Github Using Command line
Follow the few steps and successfully upload file or project on github using command line.
Step 1 – Create New Repository
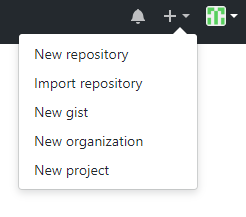
We need to create a new repository on GitHub website. Go to link and create repository click here . Click New repository from the menu on your right once you are logged into your GitHub account.

Create new repository On Github
Fill the repository name and description of your project.

Step 2 – Now Open cmd
Now go to the Terminal on your computer system. Use cd to navigate to the local project directory that you want to publish on GitHub.
CD to navigate to your directory
cd/your_directory_name
Step 3 – Initialize Local Directory
Now we will intialize our project. Use the below command to initialise the local directory as Git repository.
git init
Step 4 – Add Local repository
Add all the files in the local directory to staging using the command below.
git add .
This command stages all the files in the directory, ready for commit.
Step 5 – Commit Repository
You can now commit the staged files using the command below. It is explanatory and helpful.
git commit -m "First commit Message"
Step 6 – Add Remote Repository url
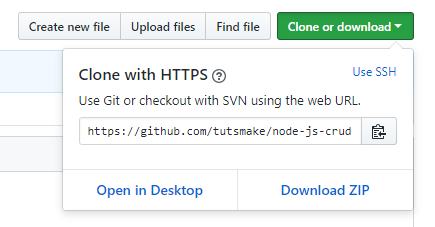
Now, copy the remote repository URL provided by github to you when you published your repository on GitHub.

Now we will add the copied URL for your GitHub repository as remote repository using the code below.
git remote add origin https://github.com/yourusername/your-repo-name.git
This command add our GitHub repository as a remote that you can then push your local repository changes.
Step 7 – Push Local Repository to github
In the last step, use the below command line in your terminal to push the local repository to GitHub. It will upload the file or project on github.
git push origin master
If you use -u in the command, it will remember your preferences for remote and branch and you can simply use the command git push next time.
git push -u origin master
Step 8 – Pull Repository from github
Pull the desired branch from the upstream repository. This method will retain the commit history without modification.
git pull origin master
All the command to use upload the file and projects on github.
 cd/your project directory

 1) git init
 2) git add . or git add ['filename']
 3) git commit -m "My first File"
 4) git remote add origin https://github.com/yourusername/your-repo-name.git
 5) git pull origin master
 6) git push origin master
In just few minutes. We have successfully upload the project or file on github using command line
can u tell me how can i upload and run my codeigniter in github????
this is very useful thanku.
Thank you so much!!!!
welcome Johanna Bepp
Very useful article. Thank you very much.
Thanks a lot for the support and help
Thanks, very useful article. very easy to understand.