Installing and configuring NextCloud on an Amazon AWS EC2 Linux server is a simple task, simply connect to the Amazon AWS Linux 2 server with SSH PuTTY, update the system, and then run a few commands to install the LAMP stack and NextCloud, it will be installed and setup on the server in just a few minutes.
NextCloud is an open-source private cloud software that you can use to store, share, and access data from anywhere online.
Here are steps to install and configure Nextcloud on Amazon AWS linux 2 with Apache 2 web server:
Step 1 – Connect to Amazon Linux Server via SSH
To connect Amazon AWS EC2 instance via putty SSH.
If you do not how to connect AWS EC2 instance via SSH, Read this => Connect AWS EC2 instance via ssh for Windows, Mac, and Linux users.
Step 2 – Update System
Firstly, start your terminal window and type the following command to update system package:
sudo apt update
Step 3 – Install LAMP on Amazon AWS Linux
Once you connect Amazon AWS instance, now install lamp stack linux, apache, php and mysql on amazon aws instance.
Simply use the following command on amazon aws linux ssh terminal window to install PHP and Apache on server:
sudo apt install -y php-cli php-fpm php-json php-intl php-imagick php-pdo php-mysql php-zip php-gd php-mbstring php-curl php-xml php-pear php-bcmath apache2 libapache2-mod-php
Once the installation is finished, Set PHP variables using the following command:
sudo vim /etc/php/*/apache2/php.ini
Then set PHP variables; is as follows:
date.timezone = Africa/Nairobi
memory_limit = 512M
upload_max_filesize = 500M
post_max_size = 500M
max_execution_time = 300
To install MySQL server on Amazon AWS Linux server, Simply run the following command on aws ssh terminal window:
sudo apt -y install mariadb-server
Secure MariaDB database server using the following command:
sudo mysql_secure_installation
Change the authentication plugin to allow the use of a root password.
sudo mysql -u root

UPDATE mysql.user SET plugin = 'mysql_native_password' WHERE User = 'root';
FLUSH PRIVILEGES;
QUIT;
Step 4 – Create a Database for NextCloud
Login into MySQL server by running the following command on ssh terminal:
mysql -u root -p
To create database and user for nextcloud on amazon aws linux 2 server, Simply the following command on amazon aws ssh terminal and press enter:
CREATE USER 'nextcloud'@'localhost' identified by 'StrongPassword';
CREATE DATABASE nextcloud;
GRANT ALL PRIVILEGES ON nextcloud.* TO 'nextcloud'@'localhost'; FLUSH PRIVILEGES;
QUIT;
Don’t forget to replace StrongPassword with your database user password.
Step 5 – Install NextCloud on Amazon AWS Linux
To install Nextcloud on Amazon AWS Linux server, Simply use the following command on AWS SSH terminal window to download nextcloud zip on the server:
sudo apt install -y wget unzip
wget https://download.nextcloud.com/server/releases/latest-23.zip
To unzip it by using the following command:
unzip latest-23.zip
To move nextcloud on /var/www/html directory by using the following command:
sudo mv nextcloud /var/www/html
sudo mkdir -p /var/www/html/nextcloud/data
To set up correct permissions of nextcloud directory and Apache 2 user by using the following command:
sudo chown -R apache:apache /var/www/html/nextcloud/sudo chmod -R 755 /var/www
Step 6 – Configure Nextcloud with Apache 2
To configure nextcloud with apache 2 web server with amazon aws linux 2, Simply open nextcloud.conf file by using the following command and configure it by adding the path of nextcloud:
sudo vim /etc/apache2/conf-enabled/nextcloud.conf
Once the nextcloud.conf file is open on ssh terminal window, Add the following code into it:
<VirtualHost *:80>

ServerName cloud.example.com
ServerAdmin [email protected]

DocumentRoot /var/www/html/nextcloud

<directory /var/www/html/nextcloud>
Require all granted
AllowOverride All
Options FollowSymLinks MultiViews
SetEnv HOME /var/www/html/nextcloud
SetEnv HTTP_HOME /var/www/html/nextcloud
</directory>

</VirtualHost>
Use the following command to enable required Apache modules and restart the service:
sudo a2enmod rewrite dir mime env headers

sudo systemctl restart apache2
Step 7 – Access Nextcloud to Complete Setup
That’s it! You’ve successfully installed NextCloud on amazon aws linux 2, Now Access your NextCloud instance at https://your_server_ip/nextcloud.
http://SERVR_IP/nextcloud/
OR
http://SERVER_ADDRESS/nextcloud/
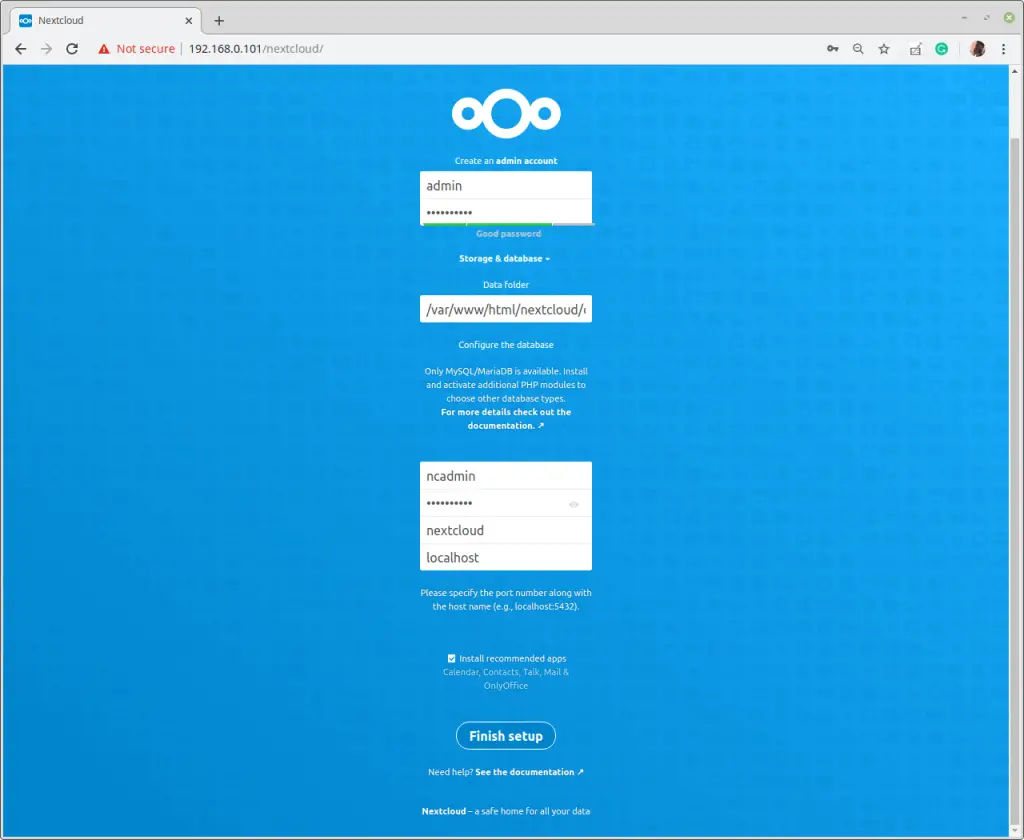
Once the installation wizard loads, create a nextcloud superuser/admin user account. Enter the username and password. Besides, click on the Storage and Database link to access additional installation configuration options for your Nextcloud data directory and database.
Then fill in the database connection details as shown in the following screenshot and click Finish Setup.

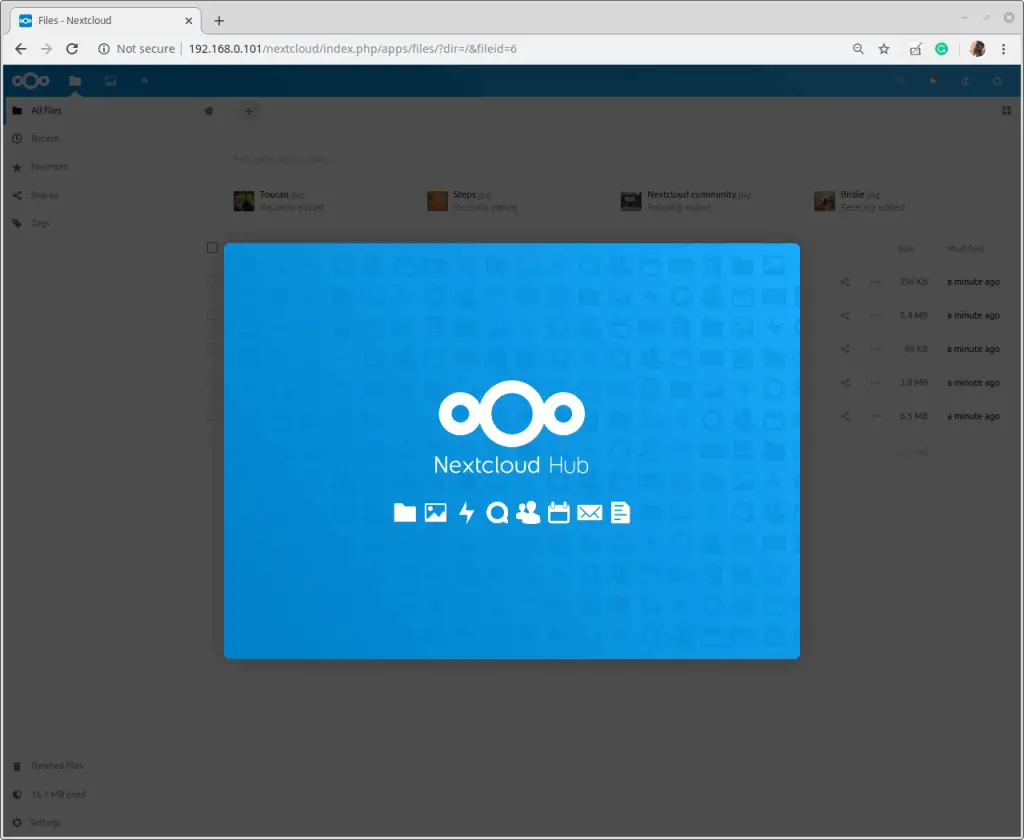
When the installation is complete, we will see the following window. Click on the forward arrow that will appear at the right side of the blue window to proceed and follow the prompts.

Conclusion
That’s it; you have learned how to install and configure Nextcloud on amazon aws ec2 linux 2 with apache 2 server.