To install the Apache 2 web server on Amazon AWS EC2 with Ubuntu 22.04|20.04, connect to the AWS ec2 Linux 2 instance with the help of Putty or SSH, then type the command sudo apt install apache2 on the ssh terminal window and press Enter, it will install on Amazon AWS EC2 Linux 2 instances with Ubuntu.
The Apache HTTP web server is the most widely used in the world. It provides many powerful features including dynamically loadable modules, robust media support, and extensive integration with other popular software.
How to Install Apache 2 on Amazon AWS Ec2 Linux 2 Ubuntu 22.04 | 20.04
Here are steps to install and configure Apache 2 web server on AWS ec2 instance Linux 2 ubuntu 20.04 | 22.04:
Step 1: Connect to Amazon AWS EC2 Instance from SSH
To connect aws ec2 Linux 2 ubuntu instance from ssh or putty.
Note:- If you are new to connecting AWS EC2 instances with Windows, ubuntu, and Mac system. So you can read this tutorial => How to Connect to ec2 Instance From Putty and SSH Terminal.
Step 2: Update System Packages
To update the latest version of the software from Ubuntu repositories, Simply type the sudo apt update command on ssh terminal window and press enter:
sudo apt update
Step 3: Install Apache on Aws Ec2 Instance Linux Ubuntu
Type sudo apt install apache2 command and press enter to install Apache 2 web server on aws ec2 linux 2 ubuntu instance:
sudo apt install apache2
Note that, on running installation of apache 2 web server on aws ec2 instance. The prompt box will be open with a “Y/N” option to continue the installation.
Please enter Y, after which the installation process will begin.
Step 4: Verify the Apache installation
After installation of Apache 2 on Ubuntu Linux 2 AWS EC2 instance, simply run apache2 --version command on ec2 ssh terminal and verify its installation:
apache2 -version
Congratulation!!, You have successfully installed the Apache 2 web server on AWS ec2 instance.
To remotely access apache2 of aws ec2 linux 2ubuntu instances, to set firewall settings for it.
Step 5: Setup Firewall with UFW on Ubuntu
Here are steps to set firewall to remotely access apache2 of aws ec2 linux 2ubuntu instances:
Step 1: List the UFW application profiles
In this step, open your terminal ssh and type the following command to list such available firewall ufw applications,:
sudo ufw app list
Then you will see a list of the application profiles:
OutputAvailable applications:
  Apache
  Apache Full
  Apache Secure
  OpenSSH
As indicated by the output, there are three profiles available for Apache:
- Apache: This profile opens only port 80 (normal, unencrypted web traffic)
- Apache Full: This profile opens both port 80 (normal, unencrypted web traffic) and port 443 (TLS/SSL encrypted traffic)
- Apache Secure: This profile opens only port 443 (TLS/SSL encrypted traffic)
Step 2: Allow Apache Full on UFW
In this step, you need to allow Apache Full on UFW will open port 80 and 443 for network traffic, while providing maximum security to the server. So, use the below given UFW command to allow Apache Full through the following command:
sudo ufw allow 'Apache Full'
You can verify the change by typing:
sudo ufw status
The output will provide a list of allowed HTTP traffic:
OutputStatus: active

To                         Action      From
--                         ------      ----
OpenSSH                    ALLOW       Anywhere
Apache                     ALLOW       Anywhere
OpenSSH (v6)               ALLOW       Anywhere (v6)
Apache (v6)                ALLOW       Anywhere (v6)
Step 3: Verify that the Apache service is running
sudo systemctl status apache2
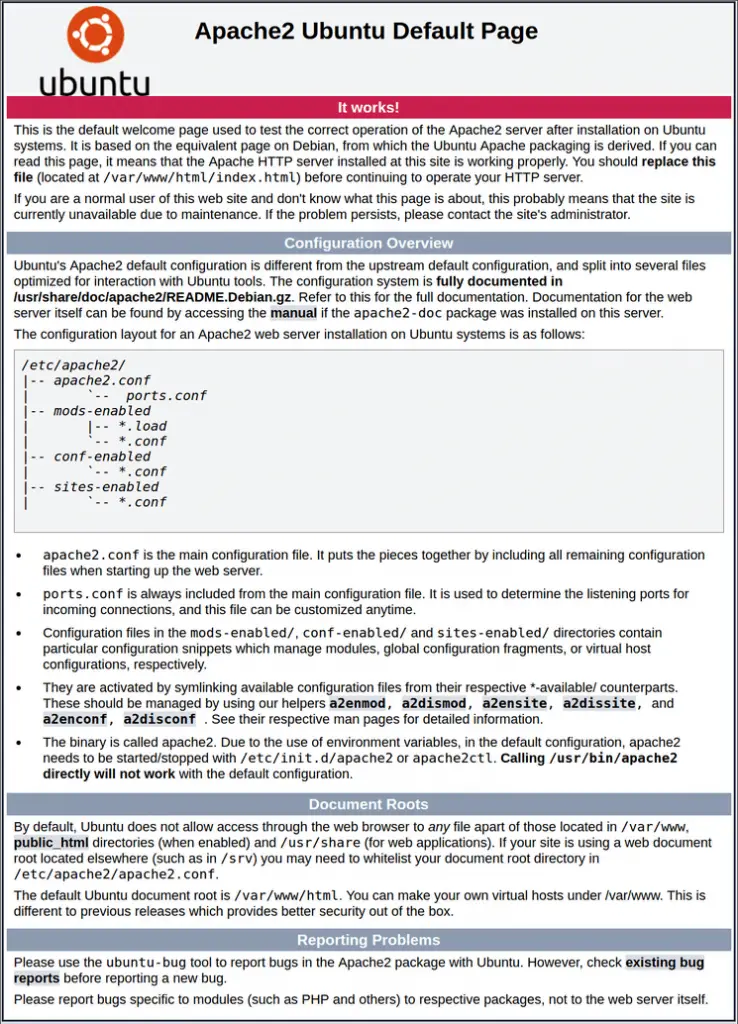
Finally, open your browser and type your AWS ec2 instance IP address. And, it will be looks like the Apache 2 page in the following picture:

Step 6: Managing the Apache Process
Here are apache 2 commands, which are used to manage apache process on aws ec2 linux 2 ubuntu instance:
1. To stop your web server, type:
sudo systemctl stop apache2
2. To start the web server when it is stopped, type:
sudo systemctl start apache2
3. To stop and then start the service again, type:
sudo systemctl restart apache2
4. If you are simply making configuration changes, Apache can often reload without dropping connections. To do this, use this command:
sudo systemctl reload apache2
5. By default, Apache is configured to start automatically when the server boots. If this is not what you want, disable this behavior by typing:
sudo systemctl disable apache2
6. To re-enable the service to start up at boot, type:
sudo systemctl enable apache2
Conclusion
That’s it; You have learned how to install, configure, and manage Apache 2 and its services on aws ec2 Linux 2 ubuntu.