Install apache 2 on aws ec2 instance with ubuntu server; Simply start ssh terminal window and connect with aws ec2 instance, Then run sudo apt update to update system packages, and run sudo apt-get install apache2 command to install apache2 webserver, and after that, run sudo systemctl status apache2 command to Verify that Apache. Finally, open your browser and type your aws ec2 instance public ip to verify apache 2 installation on ubuntu server.
Installing and configuring Apache 2 Web Server in an Amazon AWS EC2 instance is very easy, all you need to do is access your AWS EC2 instance by connecting to an SSH terminal and then run a few commands in the terminal SSH window. And will install it in your Ubuntu server and you can also configure it from terminal windows.
How to Install Apache 2 on Amazon AWS EC2 Instance Ubuntu 18.04|20.04|22.04
Let’s start installing and configuring Apache 2 on Amazon aws ec2 instance Ubuntu 18.04|20.04|22.04 by following the steps below:
Step 1: Access to AWS EC2 Instance via SSH
To access your AWS EC2 ubuntu instance via ssh terminal window.
If you don’t know how to connect to AWS EC2 instance with SSH terminal, don’t worry, there is a guide for you, read this: How to Connect to ec2 Instance From Putty and SSH Terminal.
Step 2: Update Ubuntu System Repositories
Using the sudo apt update command on ssh terminal window, you can update latest version of the software from Ubuntu repositories into your aws ec2 instance server:
sudo apt update
Step 3: Install Apache 2 on AWS EC2 Instance Ubuntu 18.04|20.04|22.04
To install apache 2 web server and configure it on aws ec2 ubuntu 22.04|20.04|18.04 server, Simply type sudo apt install apache2 command on ssh terminal window and press enter:
sudo apt install apache2
Note that, on running installation of apache 2 web server on aws ec2 instance. The prompt box will be open with a “Y/N” option to continue the installation.
Please enter Y, after which the installation process will begin.
Step 4: Verify the Apache installation
Installing Apache2 web server on your Ubuntu 18.04 EC2 instance is completed. So, open your ssh terminal and type the below command to check the Apache 2 is installed or not on our Ubuntu aws EC2 instance:
apache2 -version
Congratulation!!, You have successfully installed the Apache 2 web server on ubuntu AWS ec2 instance.
Setup Or Configure Firewall with UFW for Apache 2 Web Server
Here are steps to setup and configure firewall services for apache 2 web server:
Step 1: List the UFW application profiles
In this step, open your terminal ssh and type the following command to list such available firewall ufw applications,:
sudo ufw app list
Step 2: Allow Apache Full on UFW
In this step, you need to allow Apache Full on UFW will open port 80 and 443 for network traffic, while providing maximum security to the server. So, use the below given UFW command to allow Apache Full through the following command:
sudo ufw allow 'Apache Full'
Step 3: Verify that the Apache service is running
sudo systemctl status apache2
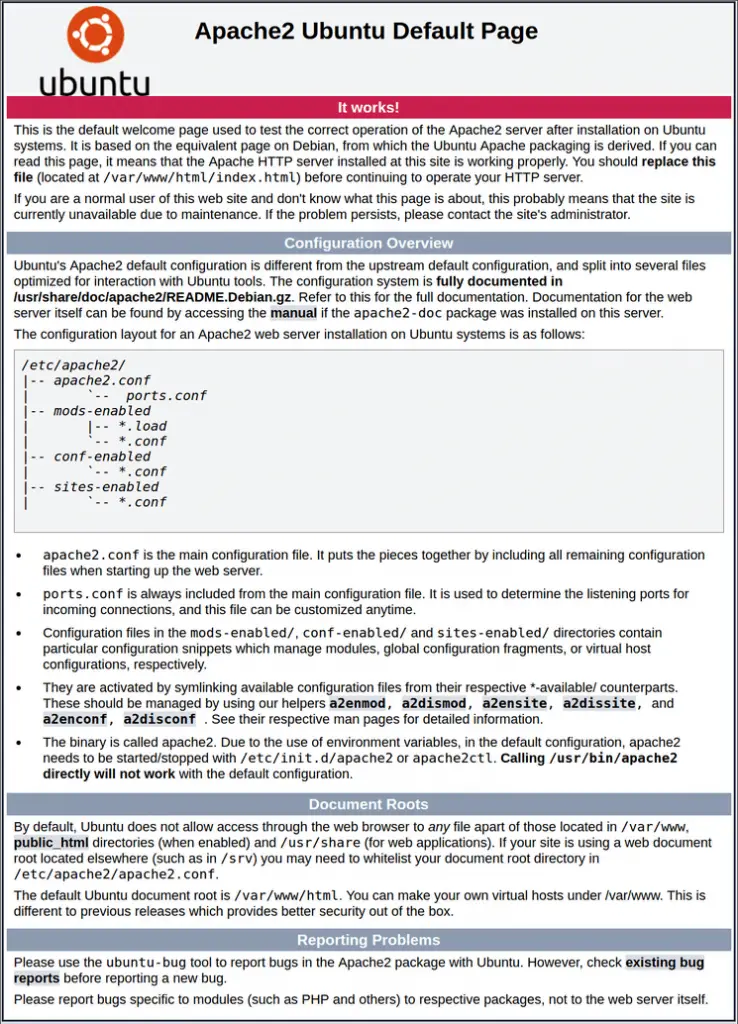
Finally, open your browser and type your AWS ec2 instance IP address. And, it will be looks like the Apache 2 page in the following picture:

Conclusion
That’s it; You have learned how to install Apache 2 on aws ec2 instance with Ubuntu 22.04|20.04|18.04 Server.